

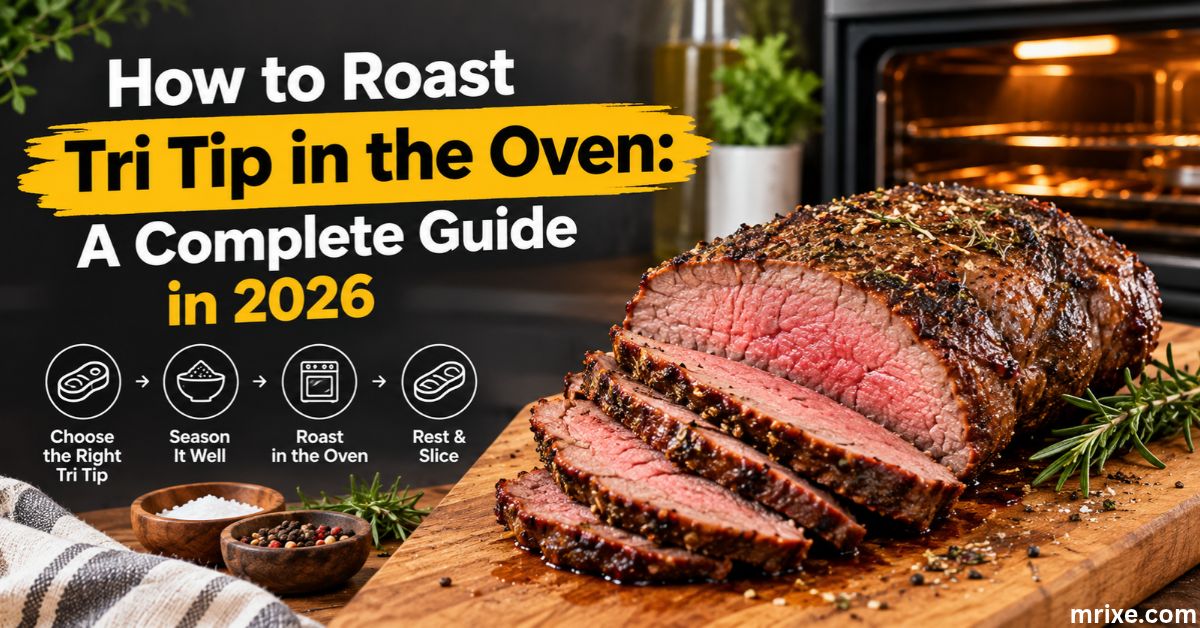
Tri tip tastes like a steakhouse cut but costs far less per pound. The catch? Your oven method decides everything. Get it right and you serve juicy, rosy slices with a savory crust. Get it wrong and you chew gray, tired beef for ten minutes.
This guide walks you through every step of cooking tri tip in the oven. You’ll find exact temperatures, a time chart by weight, a slicing method that most recipes skip, and fixes for common problems. Whether you’re feeding two people or ten, you can nail it on your first try.
Quick Facts
| Detail | Info |
|---|---|
| Prep time | 15 minutes (plus 45 minutes to 24 hours for dry brining) |
| Cook time | 35 to 60 minutes, depending on method and weight |
| Rest time | 10 to 15 minutes |
| Serves | 4 to 6 (for a 2 to 2.5 pound roast) |
| Pull temperature (medium-rare) | 125°F |
| Final temperature after rest | 130°F to 135°F |
| Best oven temperature | 425°F (sear-then-roast) or 250°F to 275°F (reverse sear) |
What Is Tri Tip (and Why It Works in the Oven)
Tri tip is a triangular muscle from the bottom sirloin. Each roast typically weighs 1.5 to 3 pounds, and a whole untrimmed one usually lands near 2 to 2.5 pounds. Butchers once ground it or cut it into small steaks. Then California cooks proved how good it tastes when roasted whole.
The cut has deep roots in Santa Maria, California. Local barbecue tradition, often tied to the 1950s, made it famous. Santa Maria-style tri tip still means a simple rub of salt, pepper, and garlic. You can read more about the cut’s history on Wikipedia’s tri-tip page.
So why does a tri tip oven method work so well? Three reasons stand out.
- It’s lean but flavorful. The beefy taste comes from the muscle itself, not heavy marbling.
- It’s thick and even. A roast of consistent thickness cooks predictably.
- It loves dry heat. High heat builds a crust while gentle heat keeps the center tender.
One feature deserves special attention. Tri tip contains two muscle groups with grain running in different directions. That quirk matters a lot at the cutting board, and we’ll cover it in detail below.
Kitchen rule worth remembering: Cook to temperature, never to the clock.
Ingredients and Equipment for This Tri Tip Roast Recipe
A great tri tip roast recipe needs very few ingredients. The meat does the heavy lifting. Still, small choices in salt, oil, and tools change the result.
Ingredients
| Ingredient | Amount (for a 2 to 2.5 lb roast) | Metric |
|---|---|---|
| Tri tip roast | 1 whole roast | about 900 to 1,135 g |
| Kosher salt | 1 tablespoon (about 2 teaspoons if using fine salt) | about 15 g |
| Black pepper, coarsely ground | 2 teaspoons | about 4 g |
| Garlic powder | 2 teaspoons | about 6 g |
| Smoked paprika | 1 teaspoon | about 3 g |
| High-smoke-point oil (avocado or refined olive) | 1 to 2 tablespoons | 15 to 30 ml |
Optional basting ingredients:
- 2 tablespoons unsalted butter
- 3 cloves fresh garlic, smashed
- 2 sprigs fresh rosemary or thyme
Why the oil matters: Extra-virgin olive oil starts smoking around 375°F to 410°F. Avocado oil handles far higher heat. A smoke-free kitchen starts with the right oil.
Equipment
You don’t need fancy gear. However, one tool is non-negotiable.
- Instant-read or leave-in probe thermometer. Tri tip goes from perfect to overcooked within minutes. Guessing doesn’t work. A probe with an alarm takes the stress out.
- Oven-safe skillet. Cast iron holds heat best. A heavy stainless pan also works.
- Roasting pan with a rack. Use this for the reverse sear method.
- Tongs. They flip the roast without piercing it.
- Aluminum foil. You’ll tent the meat while it rests.
- Cutting board with a juice groove. It catches the runoff.
- Long, sharp slicing knife. Dull blades tear the fibers and ruin the texture.
Buying and Trimming Tips
Shopping smart saves you from problems later. Look for these signs at the meat counter:
- Even thickness. A uniform roast cooks evenly.
- Visible marbling. Fine white flecks mean more flavor and juiciness.
- A fat cap about ¼ inch thick. It bastes the meat as it cooks.
- Bright red color. Avoid grayish or dull meat.
Choice vs. Prime vs. grass-fed: Prime has the most marbling and forgives slight overcooking. Choice is the common grocery store grade and works beautifully. Grass-fed tri tip is leaner. It cooks a bit faster, so check the temperature earlier.
How much to trim: Remove thick, hard silver skin because it doesn’t soften when cooked. Trim the fat cap down to about ¼ inch. Leave a thin layer for flavor.
How much to buy: Plan on roughly ½ pound of raw meat per person. A 2.5 pound roast comfortably feeds five. Prices vary by region and store, but whole tri tip roasts at major US retailers commonly run in the range of $8 to $15 per pound.
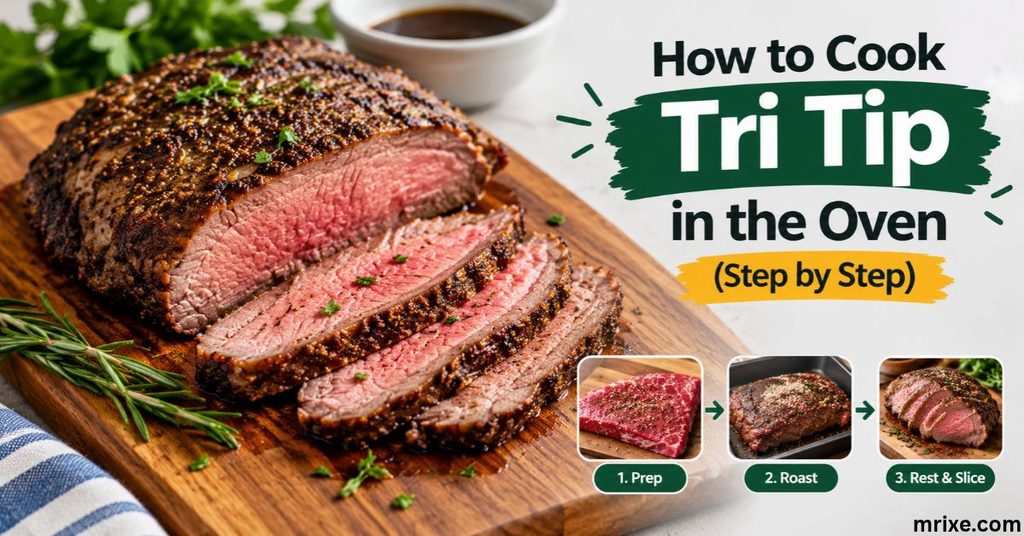
How to Cook Tri Tip in the Oven (Step by Step)
This section covers the full process. Each stage builds on the last, so don’t skip ahead. A little patience here pays off at dinner.
Prep and Season
Start early. Pat the roast completely dry with paper towels. Moisture on the surface steams the meat instead of browning it.
Next, salt the roast generously. This is a dry brine. Salt pulls moisture out, dissolves into it, and then draws it back into the meat. The result is better flavor and a juicier bite.
- Minimum: 45 minutes before cooking
- Better: 12 to 24 hours, uncovered, on a rack in the fridge
- Why uncovered: The surface dries out, which builds a better crust
About 30 to 45 minutes before cooking, pull the roast from the fridge. Let it sit on the counter. Cold meat in a hot oven cooks unevenly.
Then rub on the oil. Mix the pepper, garlic powder, and paprika. Press the blend onto every surface. Skip extra salt if you already dry brined.
Sear First or Roast First?
Two methods work well for cooking tri tip in oven conditions. Each has real advantages.
| Feature | Sear-then-Roast | Reverse Sear |
|---|---|---|
| Oven temp | 425°F | 250°F to 275°F, then a hot sear |
| Total time | Faster (about 30 to 45 minutes) | Slower (about 50 to 75 minutes) |
| Crust | Strong, deep brown | Strong, built at the end |
| Edge-to-edge color | Some gray band near the surface | Very even pink |
| Margin for error | Smaller | Larger |
| Best for | Weeknight dinners | Guests and special meals |
Our pick for most cooks: Reverse sear. It’s easier to hit your target temperature because the meat heats gently. You also get that even rosy color from edge to edge.
The sear-then-roast method is a solid alternative when time is short. Use it with a 1.5 to 2 pound roast.
Roast to Temperature, Not Time
Now comes the cooking itself. Here’s how to do it with each method.
For the reverse sear (recommended):
- Place the oven rack in the center position.
- Preheat to 250°F.
- Set the seasoned roast on a rack over a baking sheet or in a roasting pan.
- Insert the probe into the thickest part.
- Roast until the center reads 115°F to 120°F for medium-rare.
- Remove the roast and heat a skillet over high heat until it shimmers.
- Sear 1 to 2 minutes per side. Sear the fat cap too.
For sear-then-roast:
- Preheat the oven to 425°F with an oven-safe skillet inside.
- Add oil to the hot skillet.
- Sear the roast 2 to 3 minutes per side.
- Move the skillet to the oven.
- Roast until the center reaches 125°F.
Fat side up or down? Roast fat side up. As the fat renders, it bastes the meat below. For the sear, brown the fat side first to build the crust.
Covered or uncovered? Always uncovered. A lid or foil traps steam and softens the crust.
Optional baste: During the last few minutes of the sear, add butter, garlic, and herbs to the skillet. Spoon the foaming butter over the roast. This adds richness fast.
Check the Internal Temperature
An accurate thermometer is your best friend. Insert the probe into the thickest part, away from the fat cap and any bone-like edges. Check a second spot near the thinner end because tri tip tapers.
Carryover cooking is key here. Meat keeps climbing 5°F to 10°F after leaving the oven. Pull the roast early or it overshoots.
| Doneness | Pull Temp | Final Temp After Rest | What It Looks Like |
|---|---|---|---|
| Rare | 115°F to 120°F | 125°F | Cool red center |
| Medium-rare | 125°F | 130°F to 135°F | Warm red-pink center |
| Medium | 135°F | 140°F to 145°F | Pink center |
| Medium-well and above | 145°F+ | 150°F+ | Mostly gray, noticeably drier |
Tri tip is lean. Past medium, it dries out quickly because the fat can’t rescue it. Medium-rare to medium delivers the best texture.
A note on food safety: The USDA’s safe minimum internal temperature for whole cuts of beef is 145°F with a 3-minute rest time. Many cooks choose lower final temperatures for texture. Choose what fits your comfort level.
Rest the Meat
Resting is not optional. Hot muscle fibers squeeze moisture toward the center. Slice too soon and the juices run out onto the board.
- Rest for 10 to 15 minutes.
- Tent loosely with foil. Don’t wrap tightly or the crust gets soggy.
- Keep the probe handy. You’ll often see the temperature rise 5°F to 10°F.
Think of it like letting a shaken soda settle. Patience keeps the good stuff inside.
How Long to Cook Tri Tip in Oven: Time Chart
People ask how long to cook tri tip in oven more than anything else. The honest answer depends on weight, shape, starting temperature, and your specific oven. Treat these numbers as estimates, and always confirm with a thermometer.
| Roast Weight | Method | Oven Temp | Estimated Time to Reach 120°F to 125°F |
|---|---|---|---|
| 1.5 lb | Reverse sear | 250°F | 35 to 45 minutes |
| 2 lb | Reverse sear | 250°F | 45 to 60 minutes |
| 2.5 lb | Reverse sear | 250°F | 55 to 70 minutes |
| 3 lb | Reverse sear | 250°F | 65 to 80 minutes |
| 1.5 lb | Sear-then-roast | 425°F | 15 to 20 minutes after searing |
| 2 lb | Sear-then-roast | 425°F | 20 to 25 minutes after searing |
| 2.5 lb | Sear-then-roast | 425°F | 25 to 30 minutes after searing |
| 3 lb | Sear-then-roast | 425°F | 30 to 35 minutes after searing |
Rule of thumb: Expect about 15 to 20 minutes per pound at 250°F and about 10 to 12 minutes per pound at 425°F after searing. Ovens vary, so start checking early. Open the door as little as possible.
What changes the timing:
- Thicker roasts take longer than flatter ones of the same weight.
- Cold meat adds 10 to 15 minutes.
- Dark roasting pans cook faster than shiny ones.
- Older ovens often run 15°F to 25°F off. An inexpensive oven thermometer reveals the truth.
How to Slice Tri Tip Against the Grain
Slicing separates good tri tip from great tri tip. Cut wrong and even a perfectly cooked roast feels chewy. Cut right and every slice melts.
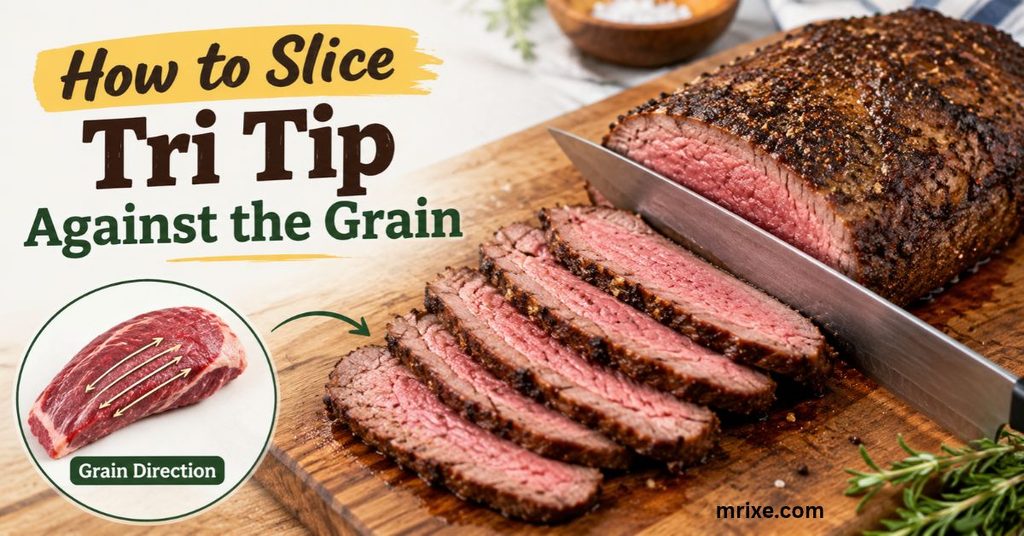
The key point: The grain changes direction near the middle of the roast. Two muscles meet at a visible seam, and their fibers run at an angle to each other.
Step-by-Step Slicing Method
- Find the seam. Look for the line of fat where the two muscles join. The roast usually has a slim “tail” and a wider “body.”
- Cut the roast in two along that seam.
- Check the grain on each half. Look for the thin lines running through the meat.
- Slice across those lines. Cut about ¼ inch thick using long, smooth strokes.
- Use a sharp knife. Don’t saw back and forth.
Visual tip: Picture a top-down sketch of the roast with two arrows. One arrow points one way on the left half. The other points a different way on the right. Always cut perpendicular to your arrow.
Why this works: Slicing across the grain shortens the muscle fibers. Shorter fibers feel tender in your mouth. Slicing with the grain leaves long, stringy strands.
If you’re unsure which direction the grain runs, cut one test slice. Pull it gently. If it stays intact and stretches, you’re cutting with the grain. Rotate and try again.
Common Mistakes When Cooking Tri Tip in the Oven
Even experienced cooks run into trouble. This table shows the most common issues and fast fixes.
| Problem | Likely Cause | Fix |
|---|---|---|
| Tough or chewy | Sliced with the grain, or overcooked | Slice across the grain and pull at 125°F |
| Gray ring around the edges | Oven too hot, or no reverse sear | Roast at 250°F, then sear at the end |
| No crust | Meat was wet, or the pan wasn’t hot enough | Pat dry, and preheat the skillet until it shimmers |
| Dry center | Pulled too late, or skipped the rest | Use a probe and rest for at least 10 minutes |
| Smoky kitchen | Wrong oil, or too much sear time | Use avocado oil and limit searing to 2 minutes per side |
| Uneven doneness | Roast was cold, or the shape was uneven | Rest it on the counter first, and fold under thin tips |
| Bland flavor | Not enough salt, or salted too late | Dry brine at least 45 minutes ahead |
Real-World Examples: Two Case Studies
These illustrative scenarios show how small changes affect results. The numbers reflect typical outcomes, not lab-tested measurements.
Case Study: The Weeknight Roast
Scenario: A home cook has a 2 pound roast and 60 minutes before dinner.
- Method: Sear-then-roast at 425°F
- Prep: Salted 45 minutes ahead, rubbed with oil and spices
- Cook: 2 minutes of searing per side, then about 22 minutes in the oven
- Pull temp: 125°F
- Rest: 12 minutes
- Result: A deep brown crust with a slim gray band beneath it. The center stays pink.
Lesson: Speed works, but the band of gray shows the trade-off. Slice thin and nobody notices.
Case Study: The Dinner Party Roast
Scenario: A host serves six guests with a 3 pound roast.
- Method: Reverse sear at 250°F
- Prep: Dry brined uncovered overnight
- Cook: About 70 minutes to hit 120°F, then 90 seconds per side in a ripping hot skillet
- Rest: 15 minutes under loose foil
- Result: Edge-to-edge rosy meat with a crisp crust.
Lesson: The extra hour pays off. A probe with an alarm lets the host relax while the roast cooks.
Flavor Variations for Your Tri Tip Roast Recipe
Once you master the base method, experiment. Here are four reliable variations.
- Santa Maria-style rub: Salt, black pepper, garlic powder, and a pinch of dried parsley. Keep it simple and let the beef shine.
- Garlic-herb butter finish: Baste with butter, smashed garlic, rosemary, and thyme during the final sear. It adds richness without much effort.
- Coffee-chili rub: Mix finely ground coffee, chili powder, brown sugar, and salt. The coffee deepens the crust and adds a slight smoky bitterness.
- Marinade option: Use a soy, garlic, and Worcestershire marinade for 2 to 6 hours. Don’t go past 12 hours or acid and salt will turn the surface mushy. Pat the roast very dry before cooking.
What to Serve with Tri Tip
A great roast deserves great company. Pick one item from each category.
Sides:
- Roasted potatoes with rosemary
- Grilled or roasted vegetables such as asparagus or zucchini
- Garlic bread
- Pinto beans, the Santa Maria classic
- A crisp green salad with vinaigrette
Sauces:
- Chimichurri (parsley, garlic, vinegar, and olive oil)
- Horseradish cream
- Pan-juice drizzle with a splash of red wine
Drinks:
- Wine: A bold Zinfandel, Syrah, or Cabernet Sauvignon pairs well with lean, beefy meat.
- Beer: An amber ale or a smooth porter matches the savory crust.
Storing, Reheating, and Using Leftovers
Leftover tri tip keeps well. However, reheating the wrong way ruins it.
Storage Guidelines
| Storage Method | How | How Long |
|---|---|---|
| Refrigerator | Airtight container | 3 to 4 days |
| Freezer | Wrapped tightly or vacuum sealed | 2 to 3 months for best quality |
Slice only what you plan to eat. A whole piece stays juicier than slices.
Reheating Without Drying It Out
- Low oven method: Place slices in a dish with a splash of beef broth. Cover with foil. Warm at 275°F for 10 to 15 minutes.
- Skillet method: Warm slices briefly in butter over medium-low heat.
- Skip the microwave unless you use low power and short bursts.
- Or eat it cold. Thin slices taste great straight from the fridge.
Leftover Ideas
- Tri tip sandwiches with horseradish mayo and arugula
- Steak tacos with lime and onion
- Steak salad with blue cheese and cherry tomatoes
- Fried rice with chopped beef and scallions
- Philly-style bowls with peppers and melted provolone
Frequently Asked Questions
What temperature should I cook tri tip in the oven?
Choose between 425°F for sear-then-roast and 250°F to 275°F for reverse sear. Both work. Reverse sear gives more even results.
How long does tri tip take per pound?
At 250°F, plan on 15 to 20 minutes per pound. At 425°F after searing, plan on 10 to 12 minutes per pound. Always confirm with a thermometer.
Should I cover tri tip while it roasts?
No. Covering traps steam and softens the crust. Only tent it with foil while it rests.
Do I cook it fat side up or down?
Fat side up. The rendering fat bastes the meat as it roasts.
Do I need to sear it first?
Not necessarily. Reverse sear works well because you sear at the end. Either way, a crust adds major flavor.
Can I cook tri tip from frozen?
Thaw it first. Frozen meat cooks unevenly and often overcooks outside before the center warms. Thaw in the fridge for 24 hours.
Is tri tip tough?
Only when overcooked or sliced incorrectly. Pull it at medium-rare and slice across the grain for a tender bite.
What’s the difference between tri tip and sirloin?
Tri tip is a specific triangular muscle from the bottom sirloin. “Sirloin” refers to a broader region. Tri tip is more tender than most sirloin steaks.
How do I know when it’s done without a thermometer?
You can’t do it reliably. Touch tests and cooking times vary too much. A thermometer costs little and saves a roast.
Final Thoughts on Roasting Tri Tip
Cooking tri tip in the oven isn’t complicated. It takes a good roast, a dry brine, a thermometer, and a little patience. Choose the reverse sear for even color. Pull at 125°F for medium-rare. Rest the meat. Then slice across the grain on each half.
Follow this how to roast tri tip in the oven method and you’ll serve juicy, tender beef every time. Your friends will ask for the recipe. Bookmark this guide so you can hand it over.
Recipe Card: Oven Roasted Tri Tip
Prep: 15 minutes (plus dry brine time) | Cook: 45 to 70 minutes | Rest: 10 to 15 minutes | Serves: 4 to 6
Ingredients
- 2 to 2.5 lb tri tip roast, trimmed
- 1 tablespoon kosher salt
- 2 teaspoons black pepper
- 2 teaspoons garlic powder
- 1 teaspoon smoked paprika
- 1 to 2 tablespoons avocado oil
- Optional: 2 tablespoons butter, 3 garlic cloves, 2 rosemary sprigs
Instructions
- Pat the roast dry and season with salt. Refrigerate uncovered for at least 45 minutes (overnight is better).
- Remove from the fridge 30 to 45 minutes before cooking.
- Heat the oven to 250°F. Rub the roast with oil and spices.
- Place on a rack in a roasting pan. Insert a probe into the thickest part.
- Roast until the center reaches 120°F to 125°F.
- Sear in a smoking-hot skillet for 1 to 2 minutes per side.
- Baste with butter, garlic, and herbs if you like.
- Rest 10 to 15 minutes under loose foil.
- Split the roast at the seam. Slice each half across the grain, about ¼ inch thick.
Nutrition Estimate (per 4 oz cooked serving)
| Nutrient | Estimate |
|---|---|
| Calories | about 210 to 260 |
| Protein | about 30 to 34 g |
| Fat | about 9 to 14 g |
| Carbohydrates | under 1 g |

Nathan Cooper is a humor writer who enjoys creating clever puns, witty jokes, and lighthearted content that brings smiles to readers. He loves sharing fresh, family friendly humor that’s fun, engaging, and easy to enjoy.